
Here again with another tutorial for Robyn's Fetish Challenge Blog.
First day of a new year, maybe it is time to try something new.
SIMPLE CIRCLE FLOWERS
Supplies
Patterned and Plain Paper and Card stock
Circle Punches - I have used from ¼ to 1¼ inches.
Glue (your choice)
That is all you need.
For my patterned pieces I have used
digital papers called "Coney Island Summers" from Robyn's Fetish Digi Stamps and More.
Additional Notes
Small
flowers require a small pattern (a large pattern will be lost). Large
flowers can have both small and large patterns. Also, certain aspects
of a pattern can be used on a large flower. If you don't have a coloured printer, no worries. Print in black and white.
Check
your punches. Here I have used Stampin' Up and Fiskar punches. What I
found was the half inch Fiskar was slightly smaller than the half inch
Stampin' Up which made a great border.
Number of circles for a flower:
1 for back of flower
5 for petal tops
5 petal backing
1 for the centre of flower
The
size is going to depend on you, but the rule of thumb would be if you
take a 1 inch circle for back of flower, half inch circles for the
petals and a quarter inch circle for the centre of the circle, then that
will make a 1.5 inch flower.

The main reason I love using digital papers is that I can print as little or as much as I need at a time.
I can also shrink them down to fit small spaces, like small flower petals.


To get the border, off set the top layer with the bottom.
Glue them together.
Glue them together.

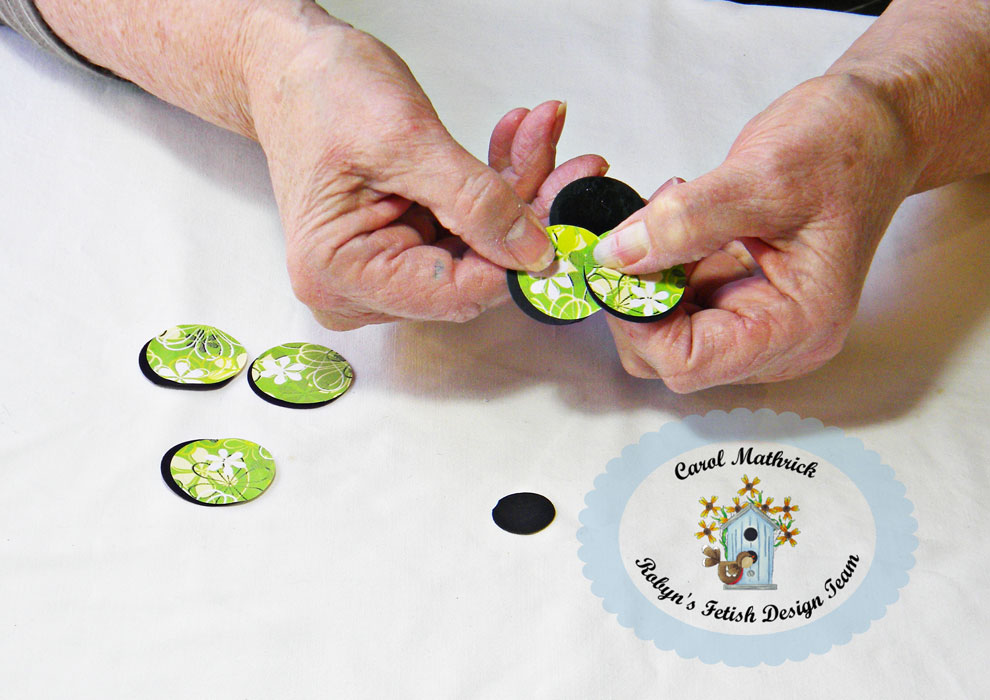
Once you have the petals completed, add glue to your base and start placing the petals around the base.

Starting
with one petal, place the next petal part way under the first,
repeating until you get to the fifth petal, which will go under the
fourth and lay on top of the first. Always make sure that the border
side overlaps the next petal. I am left handed so I hold the
flower in the left hand and the petals are inserted with my right going
clockwise around the base. If you are right handed you will do the
opposite, hold the flower in your right hand, the petals in your left
hand and go counterclockwise around the base.
When all petals are in place, your flower should look like this one, ready for the centre.
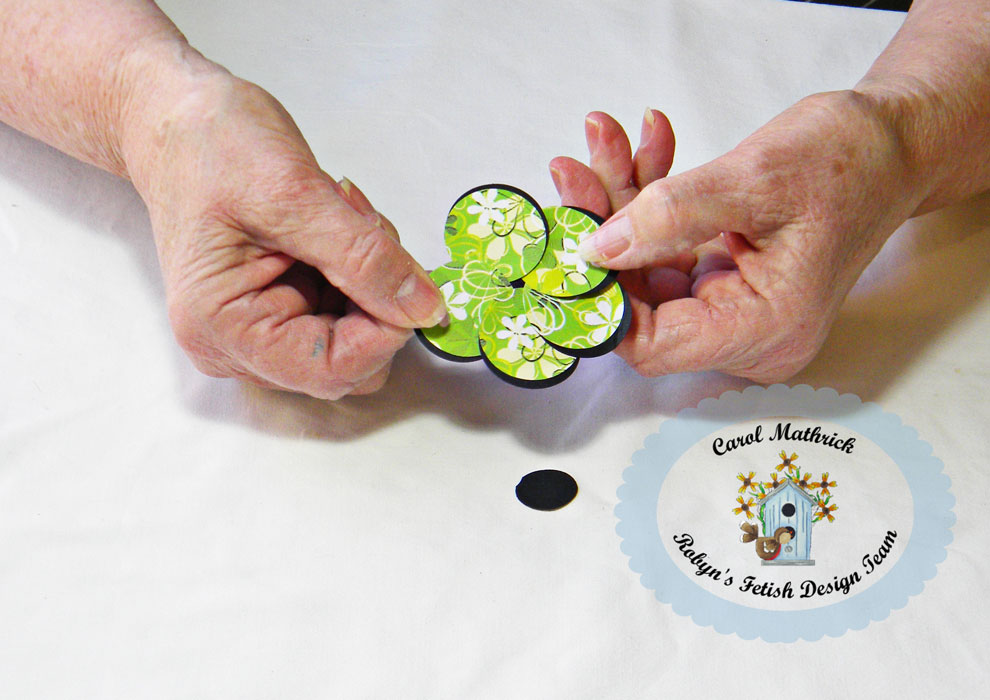
Flower completed.

Tip Time
If
you use paper, please be careful and ensure that your punches work on
paper, if not they can jam. Use some card stock with the paper if you
are unsure.
If you do use paper, trying scrunching up the petals and layering them with the same technique as before.

Starting with a few circles, we end up with flowers.

These
flowers have all been made with the same digital paper from the "Coney
Island Summers" pack. For the 3 coloured flowers, I punched certain
parts of the large pattern for each petal. For the black and white, I
turned off the colour and I also shrunk the paper down so that the
pattern would appear on the petals.

Assorted Paper Flowers.

One simple flower is all you need to make a card bright and cheery.

Hope you give these flowers a try! They are simple and take no time.
I usually punch away and put together whilst watching TV.
HAPPY NEW YEAR
Entered into:HAPPY NEW YEAR
Seize the Birthday - Anything Goes
Creative Corner - Anything Goes
4 Crafty Chicks - Anything Goes
4 comments:
Wow - what gorgeous flowers - thank you for sharing your amazing tutorial with us at 4 Crafty Chicks xoxoxox
Beautifully made these flowers, thank you for sharing. And thanks for sharing your pretty card in our challenge.
Greetings, Veerle DT member Creative Corner Challenges
What a fun tutorial! I will have to try making a flower! It is gorgeous!
Thanks so much for playing along with us at Seize the Birthday!
Anni
Will have to give your tutorial a try! Lovely flower and great card. Thanks so much for sharing with us at Seize the Birthday!
Post a Comment